
MariaDB 로 개발할 일이 생겨서 , DB 를 설치하려고 했는데 로컬에다는 왠지 깔기 싫어서 Virtual Box 에 Ubuntu를 설치하고 MariaDB 를 설치한 후에 로컬PC(Windows) 에서 DataGrip 으로 접속한 과정을 기록합니다.
1.윈도우11에 Virtual Box 를 설치
2. Ubuntu를 설치
3. MaraiDB 를 설치
4. Local 에서 이 DB에 접속하는 과정을 정리한다.
실행환경
- Windows 11
- VirtualBox-7.0.12-159484-Win
- ubuntu-22.04.3-desktop-amd64
1. VirtualBox 설치
https://www.virtualbox.org/wiki/Downloads

기본 설정으로 설치
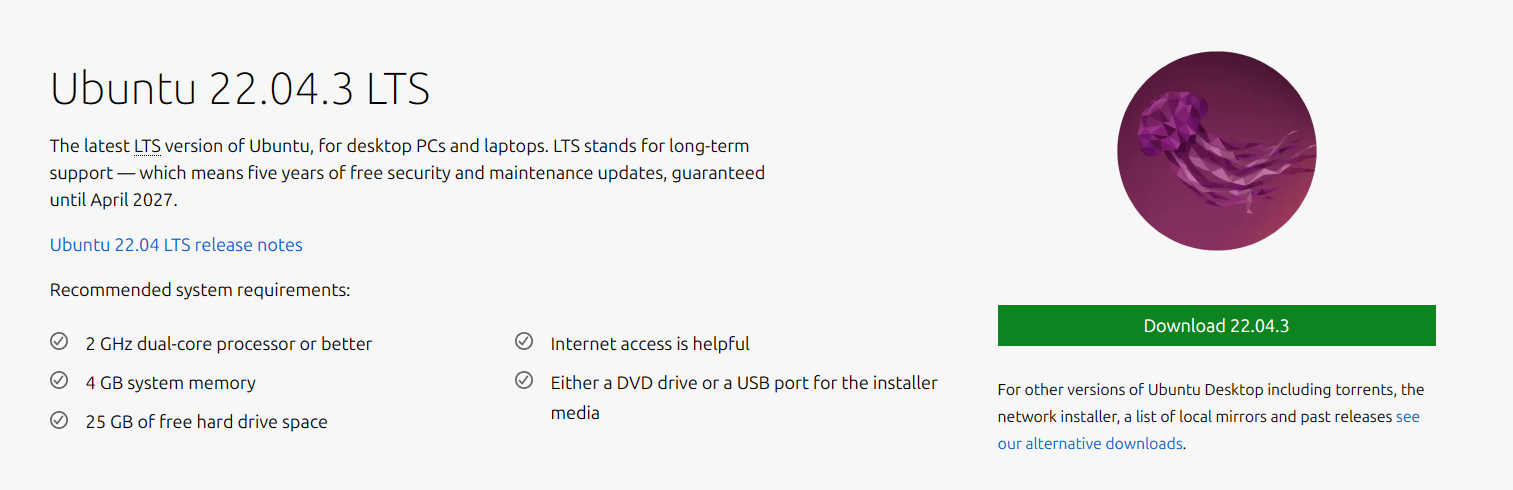
2. Ubuntu를 설치
Download Ubuntu Desktop | Download | Ubuntu
https://ubuntu.com/download/desktop
ubuntu.com
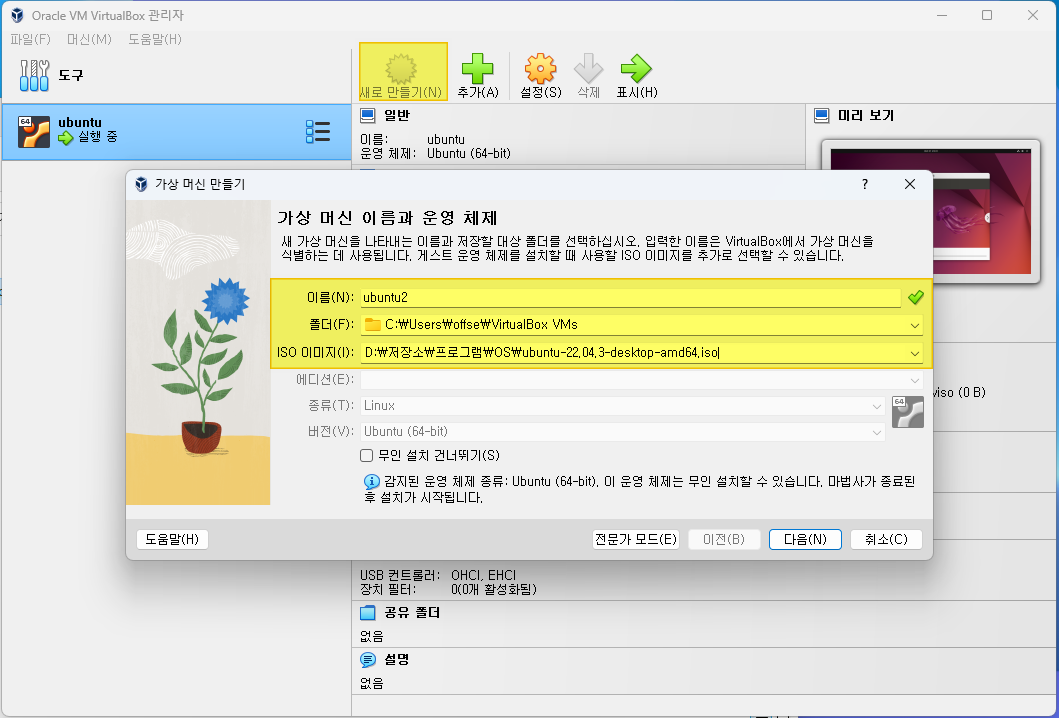
1. virtualBox 실행 후 새로 만들기 클릭
2. 이름 및 ISO 이미지 선택 후 다음
3. 계정 및 암호 입력 후 다음
4. 메모리와 프로세서는 가용한 범위내에서 적당히 선택
5. 지금 새 가상하드 디스크 만들기 후 미리 전체 크기 할당으로 선택
예전에 Log in automatically 로 했다가 로그인 안 되는 이상한 오류를 만났어서 Require my password to log in 으로 설정

우분투 설치 중...

설치 완료 후 터미널이 안 열린다.
[Linux] 버츄얼박스(VirtualBox) 우분투 터미널 안 열림 해결 방법 (tistory.com)
[Linux] 버츄얼박스(VirtualBox) 우분투 터미널 안 열림 해결 방법
우분투 터미널 안 열림 현상 해결 방법은? 얼마 전 버츄얼박스에 우분투를 설치했는데 터미널(Terminal)이 열리지 않는 현상이 발생했다. 이러한 현상은 무인 설치(Unattended Install)를 진행하면 발생
code-lab1.tistory.com
settings 에 들어가서 언어 설정을 Canada 로 바꿔준 뒤 restart 하면 터미널이 열린다고 한다. (원인은 모르겠다.)

MariaDB 를 설치하려고 보니 클립보드 공유가 안돼서 불편하다.
클립보드 공유 기능을 켜주자
1. 장치 > 게스트 확장 CD 이미지 삽입

2. 좌측에 CD 모양을 클릭 하면 폴더가 열린다.

3. autorun.sh 를 우클릭 후 run as program 을 클릭한 뒤 패스워드를 입력한다.
4. 장치 > 클립보드 공유 > 양방향으로 설정해준다.

5. ubuntu 를 종료 후 다시 켜준다.
3. MariaDB 설치하기
CMD 를 열어 뭔가를 해보려고 하니 현재 계정이 일반 사용자로 되어 있다.
$ su
Password:
# admin 계정으로 접속
$ usermod -aG sudo gomdle
# gomdle(내 계정) sudo 권한 부여
$ grep "sudo" /etc/group
sudo:x:27:gomdle
# 권한이 부여되어있는지 확인
$ sudo apt install mariadb-server
# maraiDB server 설치
$ sudo apt install mariadb-client
# mariaDB Client 설치

# 초기화 설정
$ sudo mysql_secure_installation


NOTE: RUNNING ALL PARTS OF THIS SCRIPT IS RECOMMENDED FOR ALL MariaDB

      SERVERS IN PRODUCTION USE!  PLEASE READ EACH STEP CAREFULLY!


In order to log into MariaDB to secure it, we'll need the current

password for the root user. If you've just installed MariaDB, and

haven't set the root password yet, you should just press enter here.


Enter current password for root (enter for none):

OK, successfully used password, moving on...


Setting the root password or using the unix_socket ensures that nobody

can log into the MariaDB root user without the proper authorisation.


You already have your root account protected, so you can safely answer 'n'.


Switch to unix_socket authentication [Y/n] n

 ... skipping.


You already have your root account protected, so you can safely answer 'n'.


Change the root password? [Y/n] n

 ... skipping.


By default, a MariaDB installation has an anonymous user, allowing anyone

to log into MariaDB without having to have a user account created for

them.  This is intended only for testing, and to make the installation

go a bit smoother.  You should remove them before moving into a

production environment.


Remove anonymous users? [Y/n] Y

 ... Success!


Normally, root should only be allowed to connect from 'localhost'.  This

ensures that someone cannot guess at the root password from the network.


Disallow root login remotely? [Y/n] n

 ... skipping.


By default, MariaDB comes with a database named 'test' that anyone can

access.  This is also intended only for testing, and should be removed

before moving into a production environment.


Remove test database and access to it? [Y/n] n

 ... skipping.


Reloading the privilege tables will ensure that all changes made so far

will take effect immediately.


Reload privilege tables now? [Y/n] y

 ... Success!


Cleaning up...


All done!  If you've completed all of the above steps, your MariaDB

installation should now be secure.


Thanks for using MariaDB!
마리아 DB 를 실행하고 정상적으로 실행되는지 확인한다.
$ systemctl start mariadb
$ systemctl status mariadb

* mariadb.service - MariaDB 10.6.12 database server

     Loaded: loaded (/lib/systemd/system/mariadb.service; enabled; vendor preset: enabled)

     Active: active (running) since Wed 2023-11-01 00:16:34 KST; 4min 11s ago

       Docs: man:mariadbd(8)
...
     Status: "Taking your SQL requests now..."

      Tasks: 9 (limit: 19093)

     Memory: 61.3M

        CPU: 517ms

     CGroup: /system.slice/mariadb.service

             `-24664 /usr/sbin/mariadbd
외부에서 접속할 수 있도록 방화벽 포트를 열어주자. 'success' 메시지가 나오면 된다.
$ sudo apt install firewalld
$ firewall-cmd --permanent --add-port=3306/tcp
success
$ firewall-cmd --reload
success
우분투 종료 후 virtualBox 설정에서 네트워크를 '어댑터에 브리지'로 변경
이거 쓰면 방화벽 포트 열 필요 없는듯?

cmd 에서 ifconfig 실행 후 enp~~ 에서 inet 부분 ip 복사
enp0s3: flags=4163<UP,BROADCAST,RUNNING,MULTICAST> mtu 1500
inet 192.168.0.8

server의 바인딩 포트를 0:0:0:0 으로 변경해줘야 한다고 합니다.
mariadb - ERROR 2002 (HY000): Can't connect to MySQL server on '192.168.1.15' (115) - Stack Overflow
ERROR 2002 (HY000): Can't connect to MySQL server on '192.168.1.15' (115)
I'm trying to make a MySQL database on my Raspberry Pi 4, but it isn't going very well, using localhost instead works perfectly but I want to remote control it from my Windows 10 computer on the same
stackoverflow.com
$ cd /etc/mysql/mariadb.conf.d
$ nautilus .


# vi 로 고쳐보려고 했는데 readonly 모드라고 되어있어서 sudo vi 로 열었더니 명령어가 잘 안 먹힘
# 그래서 nautilus . 로 현재 폴더 열고 텍스트 편집기로 직접 수정
# 했더니 root 아니면 readonly 여서,
$ su
# 명령어를 통해 root 계정으로 접속하여 texteditor 로 편집

# 이후 mariadb 다시 실행
$ systemctl restart mysql

이 후 될줄 알았는데 다음과 같은 오류 발생
[HY000][1130] Host '192.168.0.2' is not allowed to connect to this MariaDB server.
구글링 해보니 다음과 같이 해결하라고 함
ubuntu - ERROR 1130 (HY000): Host '' is not allowed to connect to this MySQL server - Stack Overflow
ERROR 1130 (HY000): Host '' is not allowed to connect to this MySQL server
Why oh why can I not connect to mysql? mysql -u root -ptest101 -h xxx.xxx.xxx.xxx ERROR 1130 (HY000): Host 'xxx.xxx.xxx.xxx' is not allowed to connect to this MySQL server In my.cnf I have the be...
stackoverflow.com
MariaDB [(none)]> CREATE USER 'root'@'%' IDENTIFIED BY '여기에_비번_넣으세요';

Query OK, 0 rows affected (0.004 sec)


MariaDB [(none)]> GRANT ALL PRIVILEGES ON *.* TO 'root'@'%';

Query OK, 0 rows affected (0.002 sec)


MariaDB [(none)]> FLUSH PRIVILEGES;

Query OK, 0 rows affected (0.000 sec)


MariaDB [(none)]> SELECT host FROM mysql.user WHERE User = 'root';

+-----------+

| Host      |

+-----------+

| %         |

| localhost |

+-----------+

2 rows in set (0.001 sec)
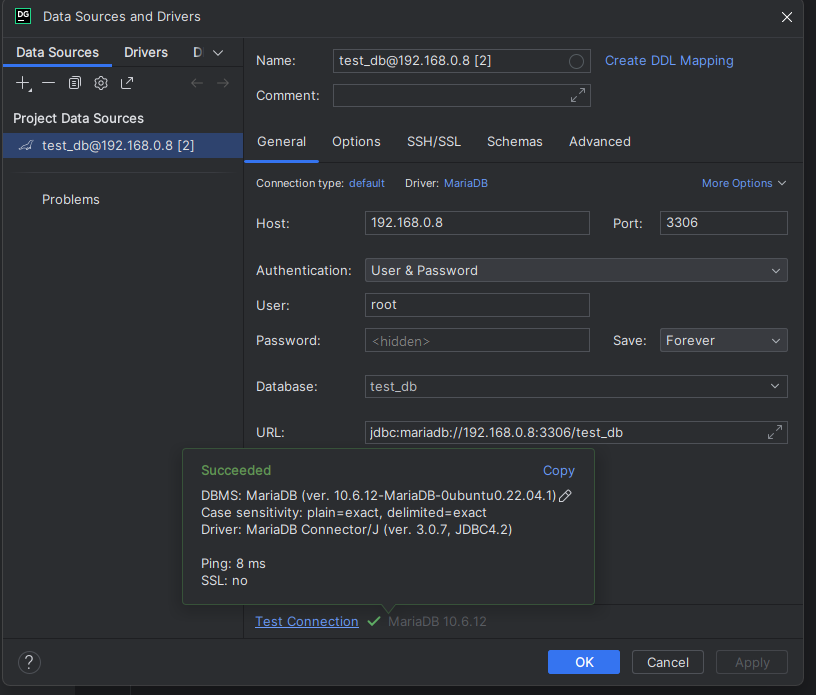
4. Local 에서 이 DB에 접속하는 과정을 정리한다.
드디어 연결 성공
참고 자료
VirtualBox + Ubuntu + MySQL 설치 하기 (tistory.com)
VirtualBox + Ubuntu + MySQL 설치 하기
회사에서 간단한 배치파일을 만들게 되었다. 이왕 만드는 김에 근본있게 만들어 보자 생각하던 중 Spring Batch 관련 글을 찾게 되었고, 주말인 오늘 실습해 보고자 한다. 라는 글을 쓰기 전에 조금
wrallee.tistory.com
Ubuntu MariaDB 설치하고 기본 설정하기 (gwangtori.com)
Ubuntu MariaDB 설치하고 기본 설정하기
안녕하세요, 광토리입니다. 요즘 MariaDB가 유행이라고 하네요? 한번 설치하고 기본 설정하는 방법을 알아보려고 합니다. 저는 Ubuntu 20.04, MariaDB 10.3.34 버전을 기준으로 설명드린다는 점 참고해 주
it.gwangtori.com
'기록 > 개발관련' 카테고리의 다른 글
| Lightsail 에 Django Crawler 배포하기 (23.08.02) (0) | 2023.08.02 |
|---|---|
| Chpat GPT의 나의 알고리즘 풀이 법 개선을 요청했다 (2) | 2023.05.02 |

